How To Create a Food Photography Setup
When it comes to food photography, taking a beautiful photo is so much more than having a delicious plate of food. One of the best ways to capture high end food and drink photos is by nailing your food photography setup.
How To Create a Food Photography Setup at Home
This article may contain affiliate links, meaning we receive a commission (at no extra cost to you) if you use that link to make a purchase.
Creating a studio for shooting at home allows you to have control over the environment, take your time, be creative and make sure the food looks fresh and appetizing. The best part: you don’t need a huge space or a fancy studio to get started. We capture all of our photos on a small dining table in our 1,000ish square foot home!

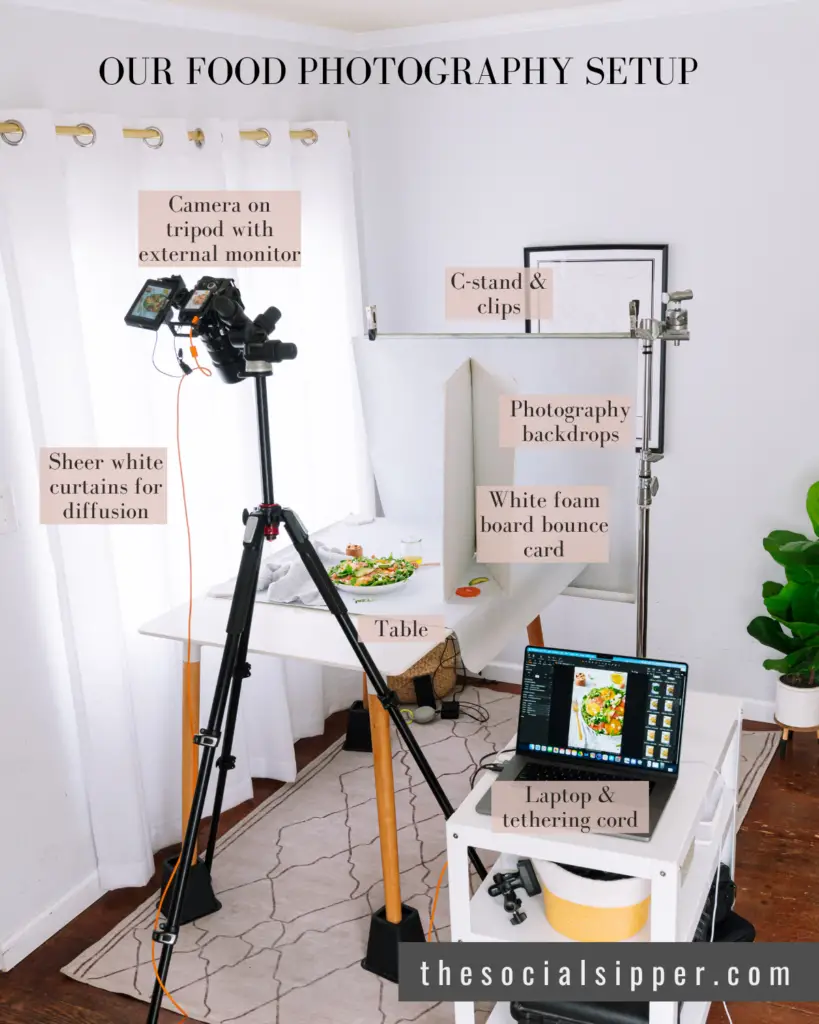
Equipment Needed for Your Food Photography Setup
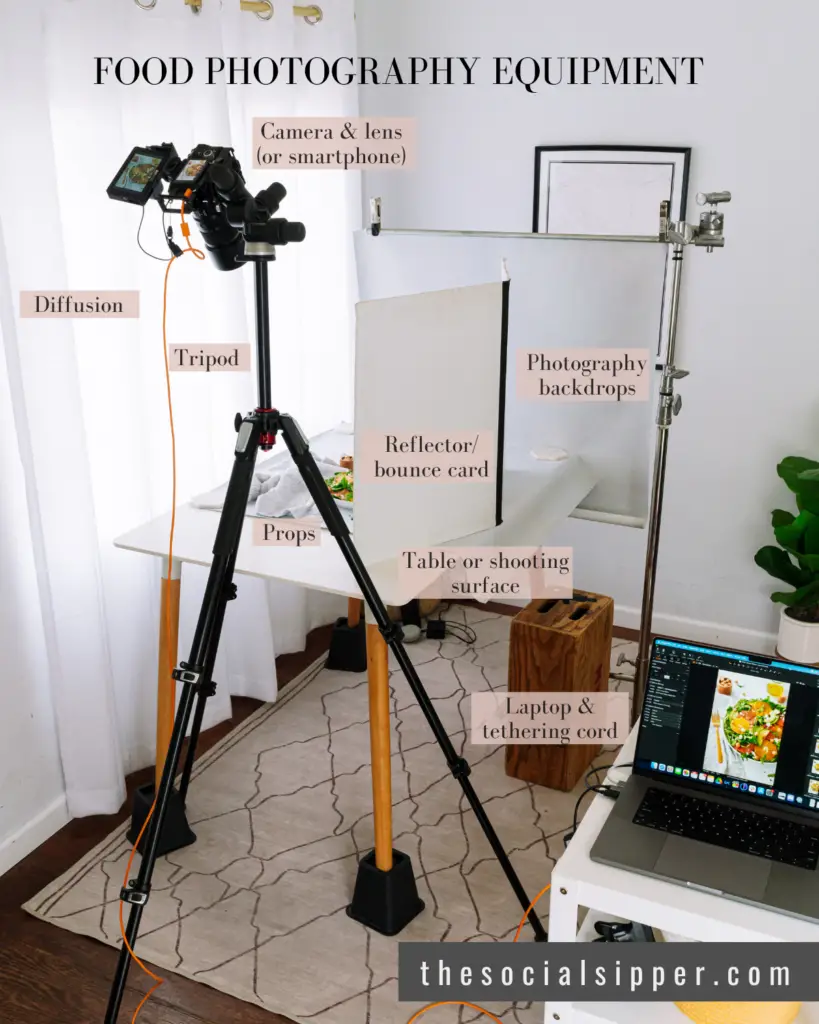
This is the basic equipment needed for a food photography studio at home:
- Camera and lens (even your smartphone can work!)
- Tripod
- Table or shooting surface (a cart can work great!)
- Lighting modifiers (a diffuser and reflector are key)
- Rigid backdrop and stand or vinyl backdrop + clips and c-stand to secure
- Props
- Laptop + cord for tethered shooting (this is optional but highly recommended!)
Step-by-Step Instructions for Your Food Photography Setup
Before I dive into the details, here are the steps to create your food photography setup:
- Step 1: Find the Right Shooting Space
- Step 2: Determine Shooting Surface & Position Near Your Light Source
- Step 3: Set Up Backdrop and Surface
- Step 4: Set Up Camera and Tripod & Frame Up Your Shot to Stand-In
- Step 5: Tether Camera to Your Computer
- Step 6: Style Scene with Props
- Step 7: Style Food and Add Finishing Elements
- Step 8: Modify Lighting
Step 1: Find the Right Shooting Space
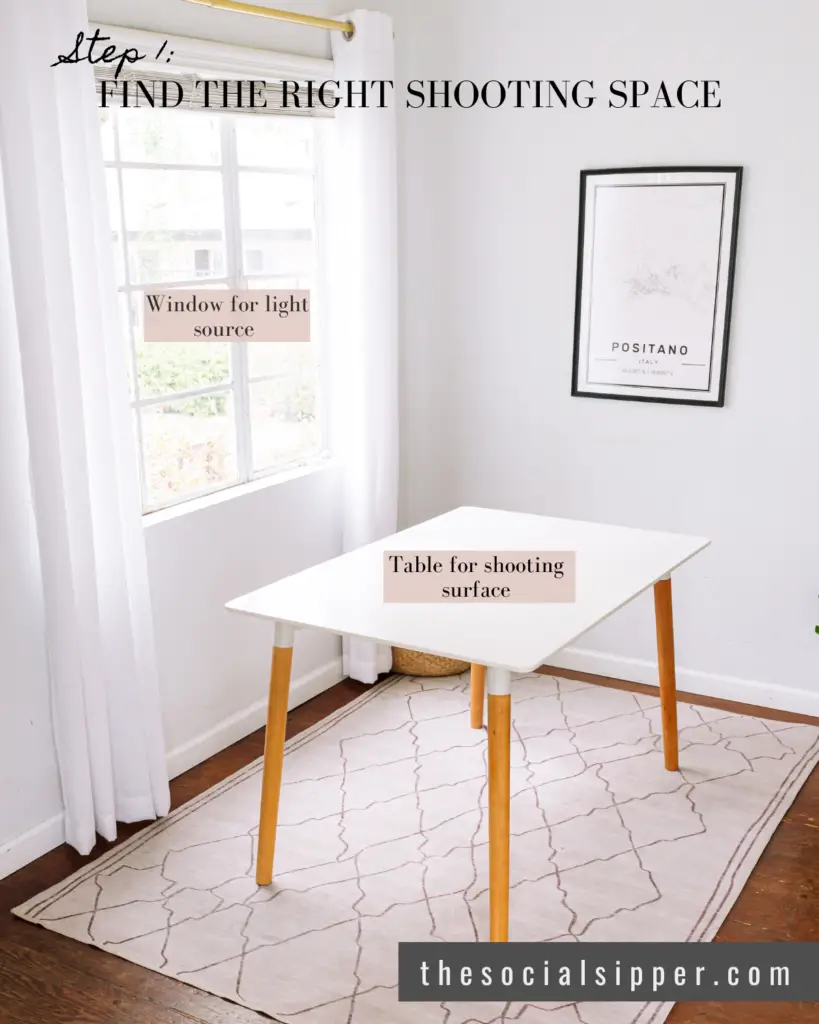
When creating your food photography setup, lighting is key. Choose a space with a large window or door for natural light food photography. Natural light will change throughout the day, so it’s helpful to think about the time you’ll generally be shooting and pick a space that has great light at that time.
Also, make sure you have enough room to move around and set up your equipment. It doesn’t have to be a large space, just enough to comfortably fit your shooting surface, tripod and a table or cart for extras. If you plan to shoot with artificial light, you’ll need extra room for your lighting as well.
Lastly, you want to think about access. I prefer to be close to the kitchen so I have a sink, trashcan and working surface nearby. This isn’t a necessity but will make shooting food and drinks a lot easier.
Step 2: Determine Shooting Surface & Position Near Your Light Source
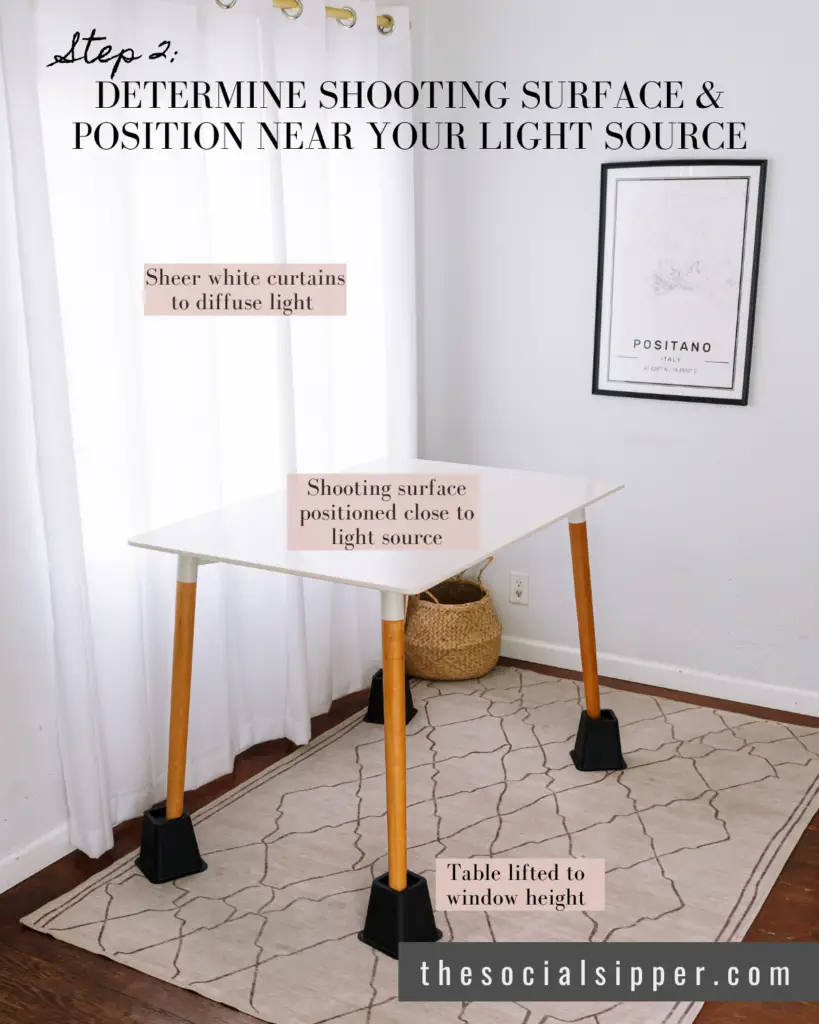
After you find the right space, you’ll want to determine your shooting surface. Consider using a table or cart and position it next to your light source so the light is coming in from the side of the scene. Don’t forget to adjust the height to align with your light source. You can use bed lifts or a table with adjustable legs if your light source requires a higher shooting surface.
We like to decide if we’ll use hard light or soft light at this point. You can learn more about the difference between the two types of lighting here.
For soft light, you can add diffusion at this time to soften any harsh light coming through the window to achieve diffused lighting. A photography diffuser, sheer white curtains or a white sheet can work. We shoot next to a window with these sheer white curtains.
Step 3: Set Up Backdrop and Surface
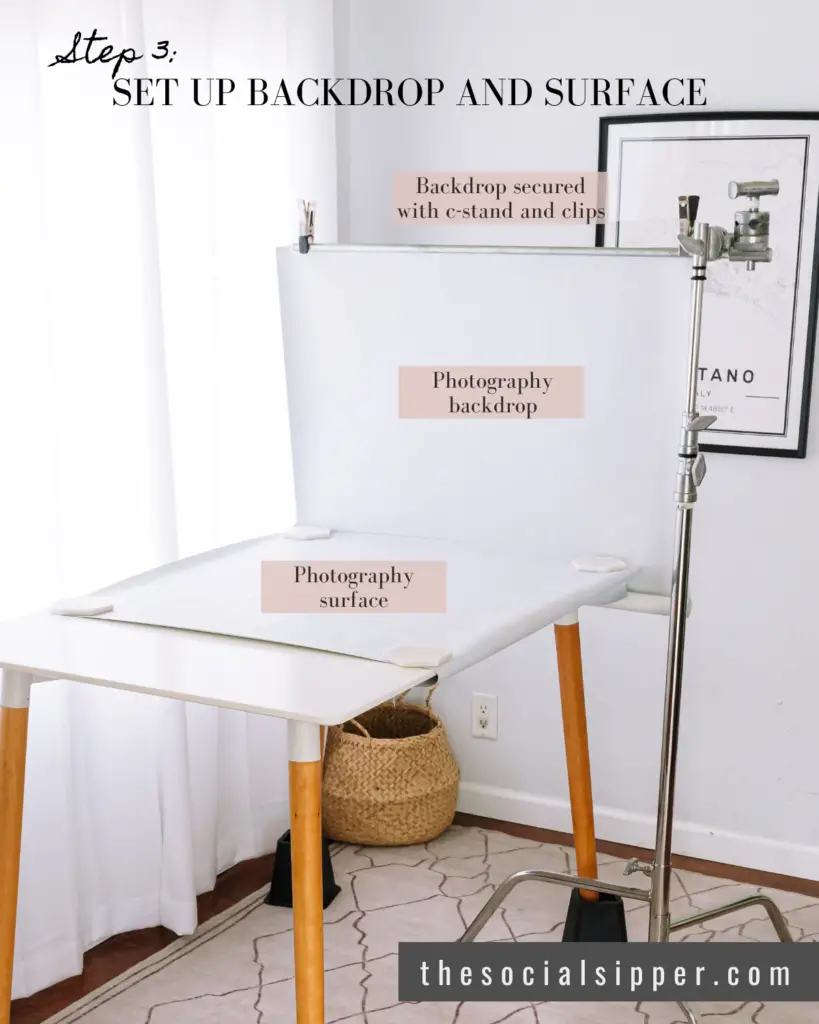
Choose a photography surface and backdrop that complements the food or drink you’ll be shooting. We usually use vinyl backdrops so we can roll them for storage but rigid backdrops are also an option. Lay your photography surface on your table and secure your backdrop in place with a stand or clips and a c-stand.
Step 4: Set Up Camera and Tripod & Frame Up Your Shot to Stand-In
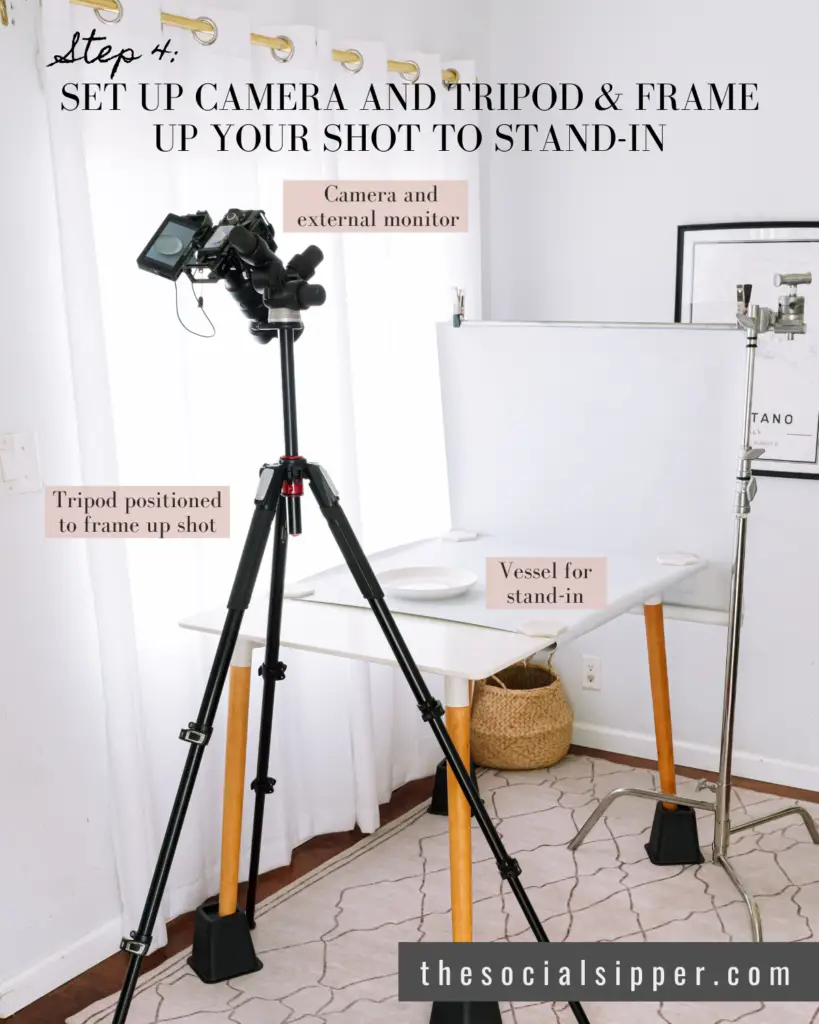
When it comes to food and drink, your subject will not always maintain freshness with time. You need to think about congealing, melting, wilting and more. In order to avoid having your food or drink “dying,” it’s best to have everything else ready to shoot before bringing your hero food or drink in. So when you are refining and styling your shot, you’ll want to start with a stand-in food item or you can choose the vessel you’ll be placing your food or drink in and on. Some examples are a glass for a cocktail, a plate for a steak or a baking sheet for your cookies. Use this item to set up your scene, test your lighting and refine your shooting angle.
Once you place your stand-in item, set up your camera on your tripod to frame up your shot. The type of food you’re shooting often dictates which angle will work best.
Bonus tip: If you have an external monitor, connect it to your camera for better viewing as you style your scene.
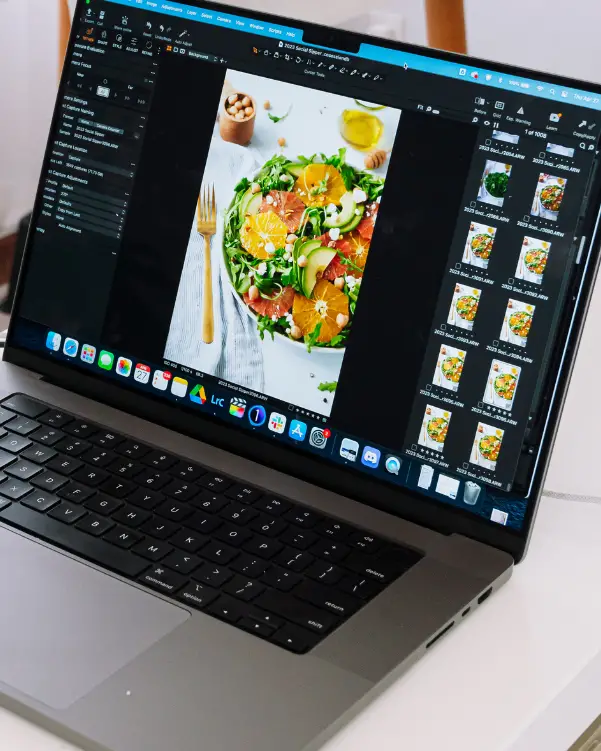
Step 5: Tether Camera to Your Computer
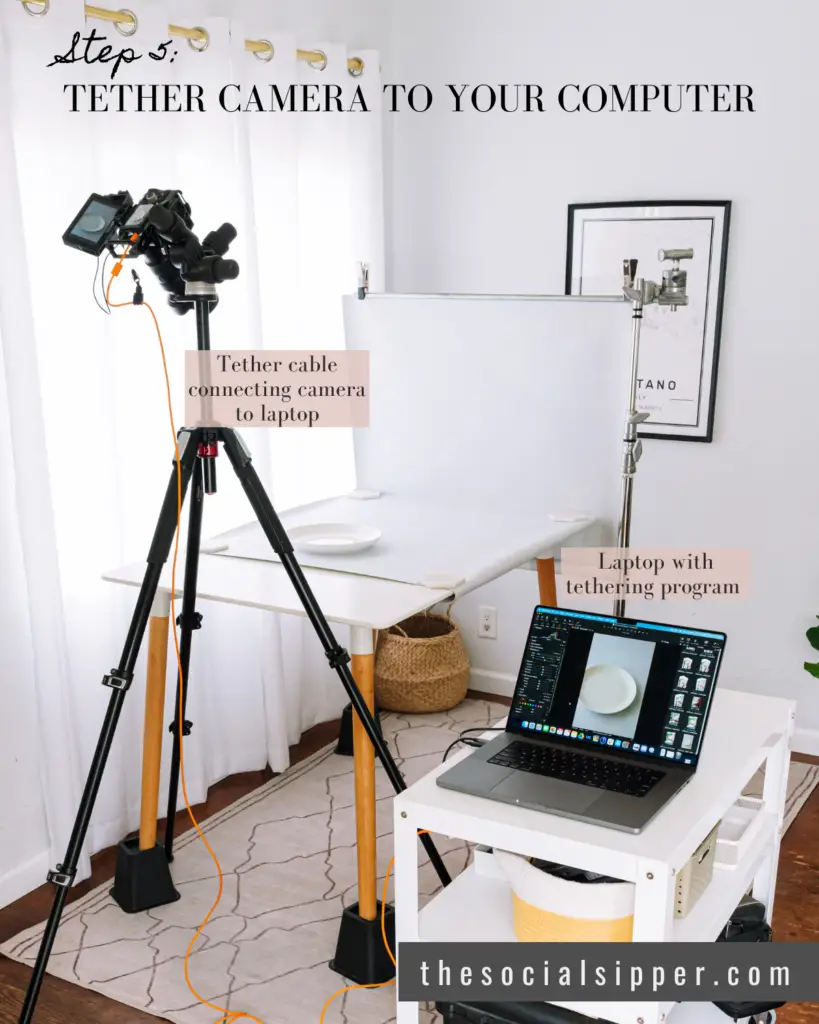
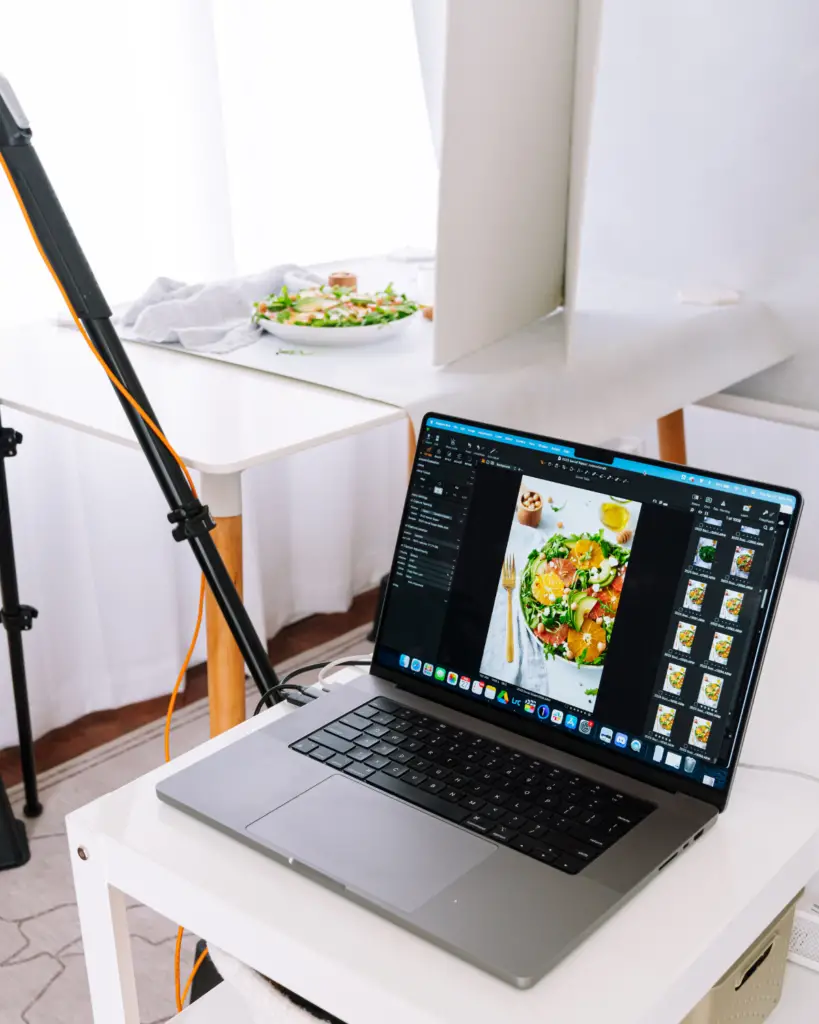
Tethering is optional but I highly recommend tethering your camera to your laptop. Tethering allows you to view your photos in real time so you can easily make adjustments, zoom in and check focus. This is especially important for product photography. In order to tether, you’ll need a cable to attach your camera to your laptop and a program like Lightroom or Capture 1 to view the photos.
Step 6: Style Scene with Props
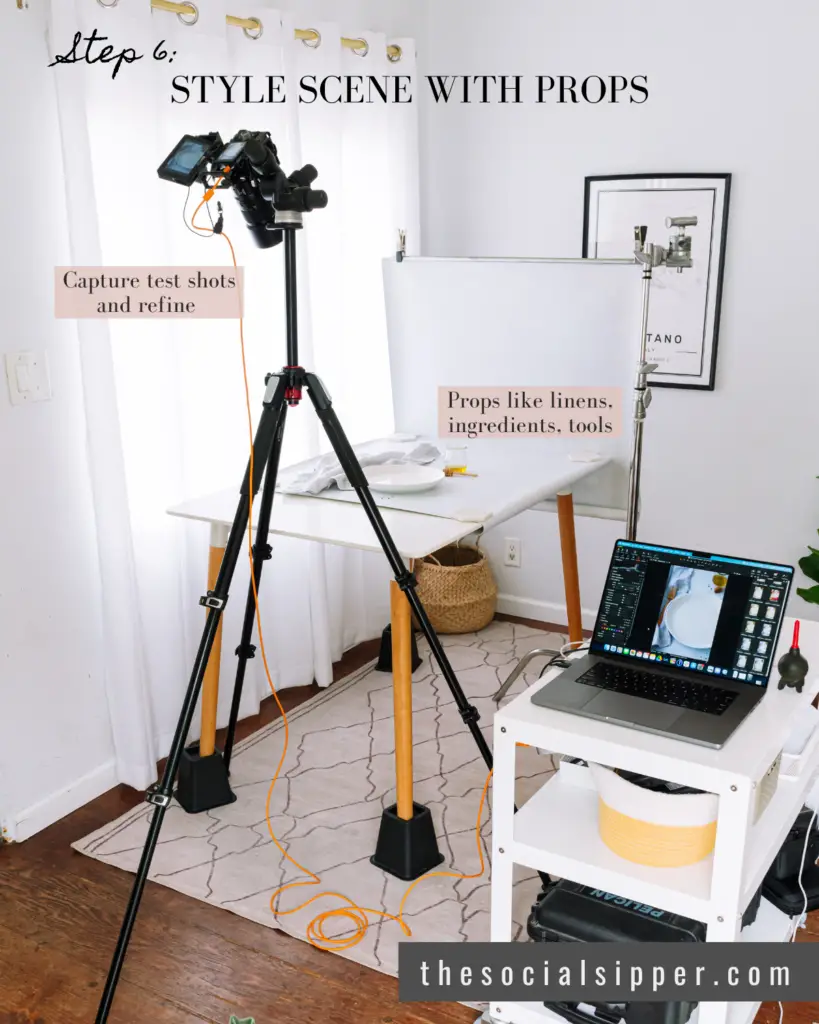
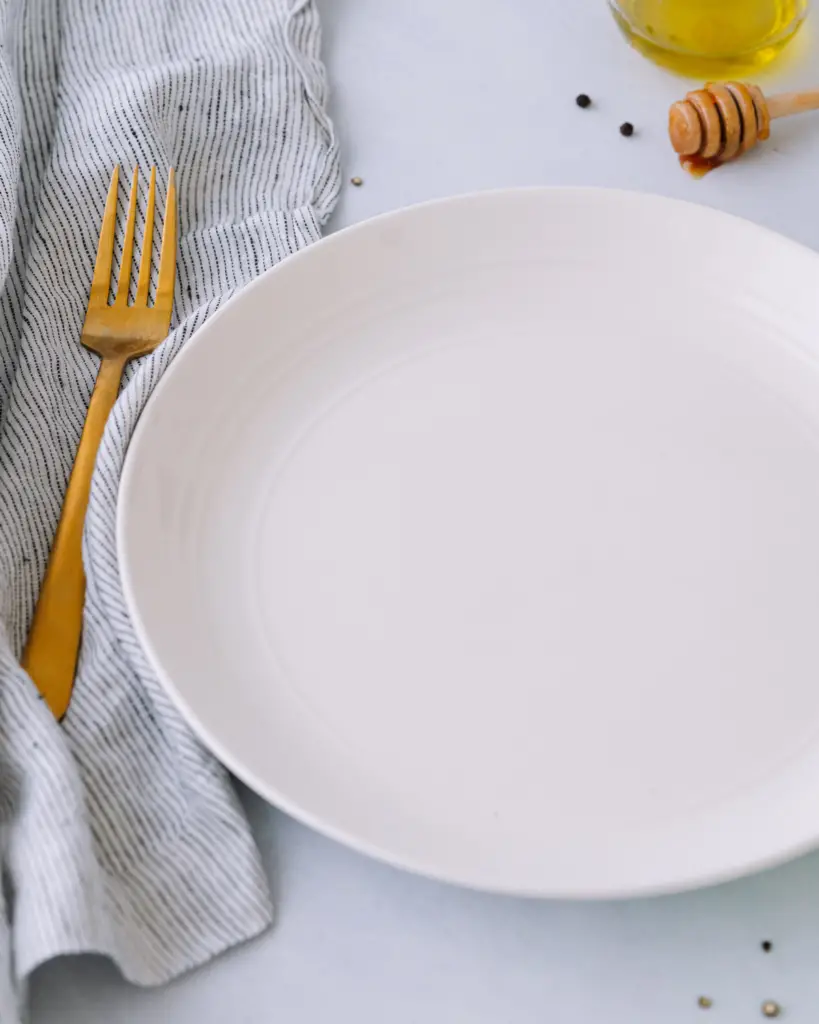
Add props such as linens, flowers, ingredients and cooking utensils to complement your food. Just make sure not to add anything that will wilt or melt when you are setting up. We like to take test shots at this point to see what looks best.
Step 7: Style Food and Add Finishing Elements
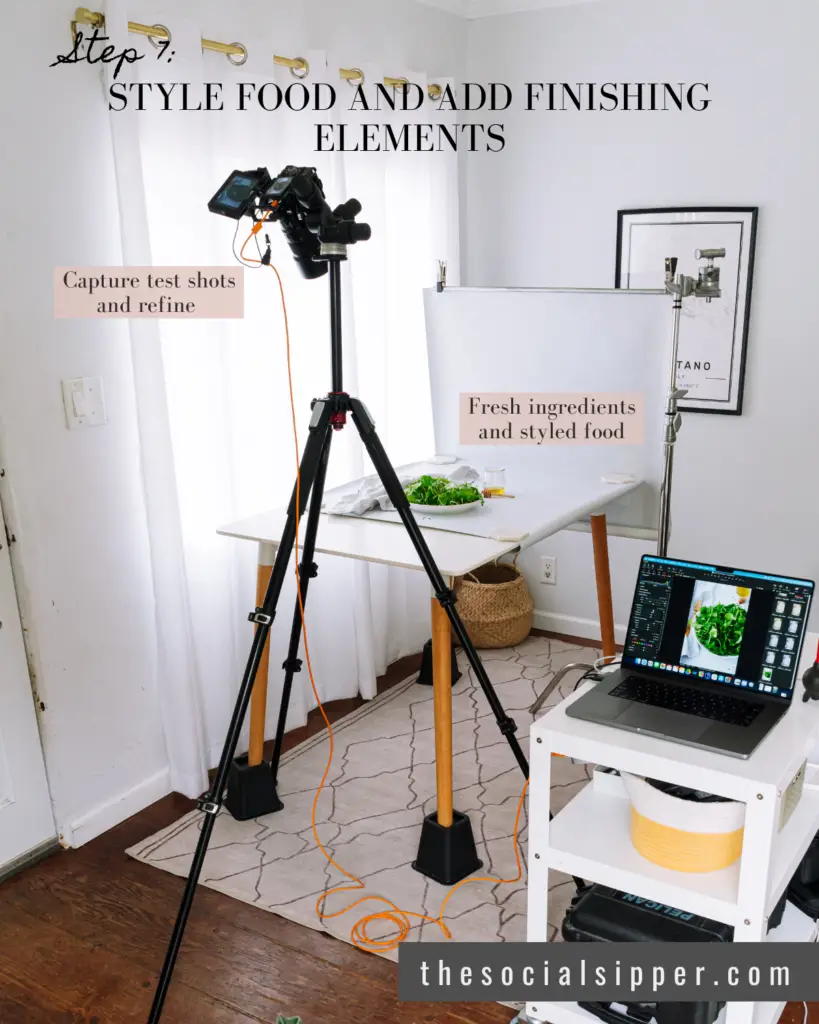
When you have your styling and angle locked in, it’s time to add your food or drink and any finishing elements such as herbs, sauces and garnishes. Take several test shots during this process and refine your overall styling.
Step 8: Modify Lighting
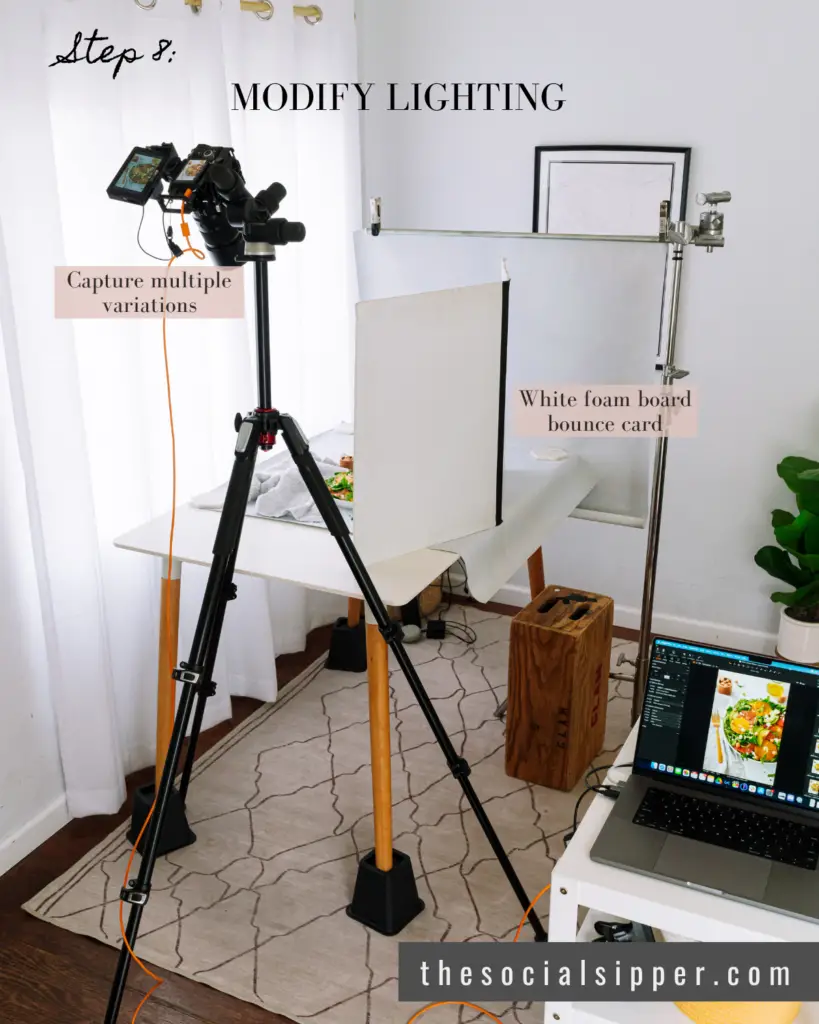
Before snapping your final shot, take a look at your lighting and make any final adjustments or and add lighting modifiers. Notice if you are getting light in all important areas of your scene and pay special attention to your hero food and any products you are featuring. You can add a bounce card or reflector to reflect or shape the light. When it comes to modifying your light, there is no “best” way. It’s more about your personal taste and the style you’re hoping to achieve. We capture photos with and without reflectors and adjust the diffusion to let light in to certain areas of the scene so we have lots of options for our final photo.
Food Photography Setup – Final Words
Creating a food photography setup at home is a great way to improve the quality and consistency of your photos. With just a few pieces of basic equipment and some careful planning, you can create mouth-watering images that will make your audience crave your food. Remember, you don’t need a huge space or expensive gear to get started. With a little creativity and the right equipment, you can set up a home studio for food photography that works for you.
I hope this has inspired you to set up your own home studio for food photography. if you have any questions or comments please let me know in the comments below!
More Photography Resources
- The Complete Guide to Food Photography on a Budget
- How to Get Brand Partnerships Without a Large Following
- How to Turn Gifts Into Paid Partnerships with Food Brands
And if you’re ready to start creating income with your passion for food and photography, get started for free with this actionable training – 5 Secrets to High-End Food (& Drink) Photography That Makes You More Money!


I just like the helpful information you provide in your articles
You’re so awesome! I don’t believe I have read a single thing like that before. So great to find someone with some original thoughts on this topic. Really.. thank you for starting this up. This website is something that is needed on the internet, someone with a little originality!